Viewer & UI
Finally, we're ready to build the client-side piece of our application.
If you're developing with Node.js, you can use TypeScript definitions for the Viewer API. Run
npm install --dev @types/forge-viewer
in your terminal to add the TypeScript definition file to your project.
Viewer logic
Let's start by implementing the Viewer functionality for our application.
Create a viewer.js file under the wwwroot subfolder with the following code:
/// import * as Autodesk from "@types/forge-viewer";

async function getAccessToken(callback) {
    try {
        const resp = await fetch('/api/auth/token');
        if (!resp.ok) {
            throw new Error(await resp.text());
        }
        const { access_token, expires_in } = await resp.json();
        callback(access_token, expires_in);
    } catch (err) {
        alert('Could not obtain access token. See the console for more details.');
        console.error(err);
    }
}

export function initViewer(container) {
    return new Promise(function (resolve, reject) {
        Autodesk.Viewing.Initializer({ getAccessToken }, function () {
            const config = {
                extensions: ['Autodesk.DocumentBrowser']
            };
            const viewer = new Autodesk.Viewing.GuiViewer3D(container, config);
            viewer.start();
            viewer.setTheme('light-theme');
            resolve(viewer);
        });
    });
}

export function loadModel(viewer, urn) {
    return new Promise(function (resolve, reject) {
        function onDocumentLoadSuccess(doc) {
            resolve(viewer.loadDocumentNode(doc, doc.getRoot().getDefaultGeometry()));
        }
        function onDocumentLoadFailure(code, message, errors) {
            reject({ code, message, errors });
        }
        viewer.setLightPreset(0);
        Autodesk.Viewing.Document.load('urn:' + urn, onDocumentLoadSuccess, onDocumentLoadFailure);
    });
}
The script is an ES6 module
that exports two functions, initViewer that will create a new instance of the Viewer
in the specified DOM container, and loadModel which will load a specific model to the viewer.
When initializing the viewer we include a small helper function (getAccessToken) that
retrieves a public token from our server application. The viewer can then use this token
to start loading assets from the Model Derivative service.
Application logic
Next, let's define the logic of the web application itself. We will need to populate
the UI with all models available for viewing, as well as add UI for uploading and
translating new models. Create a main.js file under the wwwroot subfolder with the following code:
import { initViewer, loadModel } from './viewer.js';

initViewer(document.getElementById('preview')).then(viewer => {
    const urn = window.location.hash?.substring(1);
    setupModelSelection(viewer, urn);
    setupModelUpload(viewer);
});

async function setupModelSelection(viewer, selectedUrn) {
    const dropdown = document.getElementById('models');
    dropdown.innerHTML = '';
    try {
        const resp = await fetch('/api/models');
        if (!resp.ok) {
            throw new Error(await resp.text());
        }
        const models = await resp.json();
        dropdown.innerHTML = models.map(model => `<option value=${model.urn} ${model.urn === selectedUrn ? 'selected' : ''}>${model.name}</option>`).join('\n');
        dropdown.onchange = () => onModelSelected(viewer, dropdown.value);
        if (dropdown.value) {
            onModelSelected(viewer, dropdown.value);
        }
    } catch (err) {
        alert('Could not list models. See the console for more details.');
        console.error(err);
    }
}

async function setupModelUpload(viewer) {
    const upload = document.getElementById('upload');
    const input = document.getElementById('input');
    const models = document.getElementById('models');
    upload.onclick = () => input.click();
    input.onchange = async () => {
        const file = input.files[0];
        let data = new FormData();
        data.append('model-file', file);
        if (file.name.endsWith('.zip')) { // When uploading a zip file, ask for the main design file in the archive
            const entrypoint = window.prompt('Please enter the filename of the main design inside the archive.');
            data.append('model-zip-entrypoint', entrypoint);
        }
        upload.setAttribute('disabled', 'true');
        models.setAttribute('disabled', 'true');
        showNotification(`Uploading model <em>${file.name}</em>. Do not reload the page.`);
        try {
            const resp = await fetch('/api/models', { method: 'POST', body: data });
            if (!resp.ok) {
                throw new Error(await resp.text());
            }
            const model = await resp.json();
            setupModelSelection(viewer, model.urn);
        } catch (err) {
            alert(`Could not upload model ${file.name}. See the console for more details.`);
            console.error(err);
        } finally {
            clearNotification();
            upload.removeAttribute('disabled');
            models.removeAttribute('disabled');
            input.value = '';
        }
    };
}

async function onModelSelected(viewer, urn) {
    if (window.onModelSelectedTimeout) {
        clearTimeout(window.onModelSelectedTimeout);
        delete window.onModelSelectedTimeout;
    }
    window.location.hash = urn;
    try {
        const resp = await fetch(`/api/models/${urn}/status`);
        if (!resp.ok) {
            throw new Error(await resp.text());
        }
        const status = await resp.json();
        switch (status.status) {
            case 'n/a':
                showNotification(`Model has not been translated.`);
                break;
            case 'inprogress':
                showNotification(`Model is being translated (${status.progress})...`);
                window.onModelSelectedTimeout = setTimeout(onModelSelected, 5000, viewer, urn);
                break;
            case 'failed':
                showNotification(`Translation failed. <ul>${status.messages.map(msg => `<li>${JSON.stringify(msg)}</li>`).join('')}</ul>`);
                break;
            default:
                clearNotification();
                loadModel(viewer, urn);
                break;
        }
    } catch (err) {
        alert('Could not load model. See the console for more details.');
        console.error(err);
    }
}

function showNotification(message) {
    const overlay = document.getElementById('overlay');
    overlay.innerHTML = `<div class="notification">${message}</div>`;
    overlay.style.display = 'flex';
}

function clearNotification() {
    const overlay = document.getElementById('overlay');
    overlay.innerHTML = '';
    overlay.style.display = 'none';
}
The scripts will initialize the viewer, populate a dropdown element in the UI with models
retrieved from the /api/models endpoint, and setup the file upload. And when one of the models
in the dropdown is selected, the app logic will check the status of the model in APS (for example,
whether it's still being translated, or whether the translation failed), and load the model when
it's available.
User interface
Finally, let's define the UI of our application with a simple HTML markup and CSS.
Create an index.html file in the wwwroot subfolder with the following content:
<!DOCTYPE html>
<html lang="en">

<head>
    <meta charset="UTF-8">
    <meta name="viewport" content="width=device-width, initial-scale=1.0">
    <meta http-equiv="X-UA-Compatible" content="ie=edge">
    <link rel="icon" type="image/x-icon" href="https://cdn.autodesk.io/favicon.ico">
    <link rel="stylesheet" href="https://developer.api.autodesk.com/modelderivative/v2/viewers/7.*/style.css">
    <link rel="stylesheet" href="/main.css">
    <title>Autodesk Platform Services: Simple Viewer</title>
</head>

<body>
    <div id="header">
        <img class="logo" src="https://cdn.autodesk.io/logo/black/stacked.png" alt="Autodesk Platform Services">
        <span class="title">Simple Viewer</span>
        <select name="models" id="models"></select>
        <button id="upload" title="Upload New Model">Upload</button>
        <input style="display: none" type="file" id="input">
    </div>
    <div id="preview"></div>
    <div id="overlay"></div>
    <script src="https://developer.api.autodesk.com/modelderivative/v2/viewers/7.*/viewer3D.js"></script>
    <script src="/main.js" type="module"></script>
</body>

</html>
The HTML markup simply uses a <select> element as the dropdown for listing the viewable models,
and an <input type="file"> element with a <button> to handle the uploading of a new model.
Create a main.css file, also under the wwwroot subfolder, and populate it with these CSS rules:
body, html {
    margin: 0;
    padding: 0;
    height: 100vh;
    font-family: ArtifaktElement;
}

#header, #preview, #overlay {
    position: absolute;
    width: 100%;
}

#header {
    height: 3em;
    display: flex;
    flex-flow: row nowrap;
    justify-content: space-between;
    align-items: center;
}

#preview, #overlay {
    top: 3em;
    bottom: 0;
}

#overlay {
    z-index: 1;
    background-color: rgba(0, 0, 0, 0.5);
    padding: 1em;
    display: none;
}

#overlay > .notification {
    margin: auto;
    padding: 1em;
    max-width: 50%;
    background: white;
}

#header > * {
    height: 2em;
    margin: 0 0.5em;
    font-size: 1em;
    font-family: ArtifaktElement;
}

#header .title {
    flex: 1 0 auto;
    height: auto;
}

#models {
    flex: 0 1 auto;
    min-width: 2em;
}
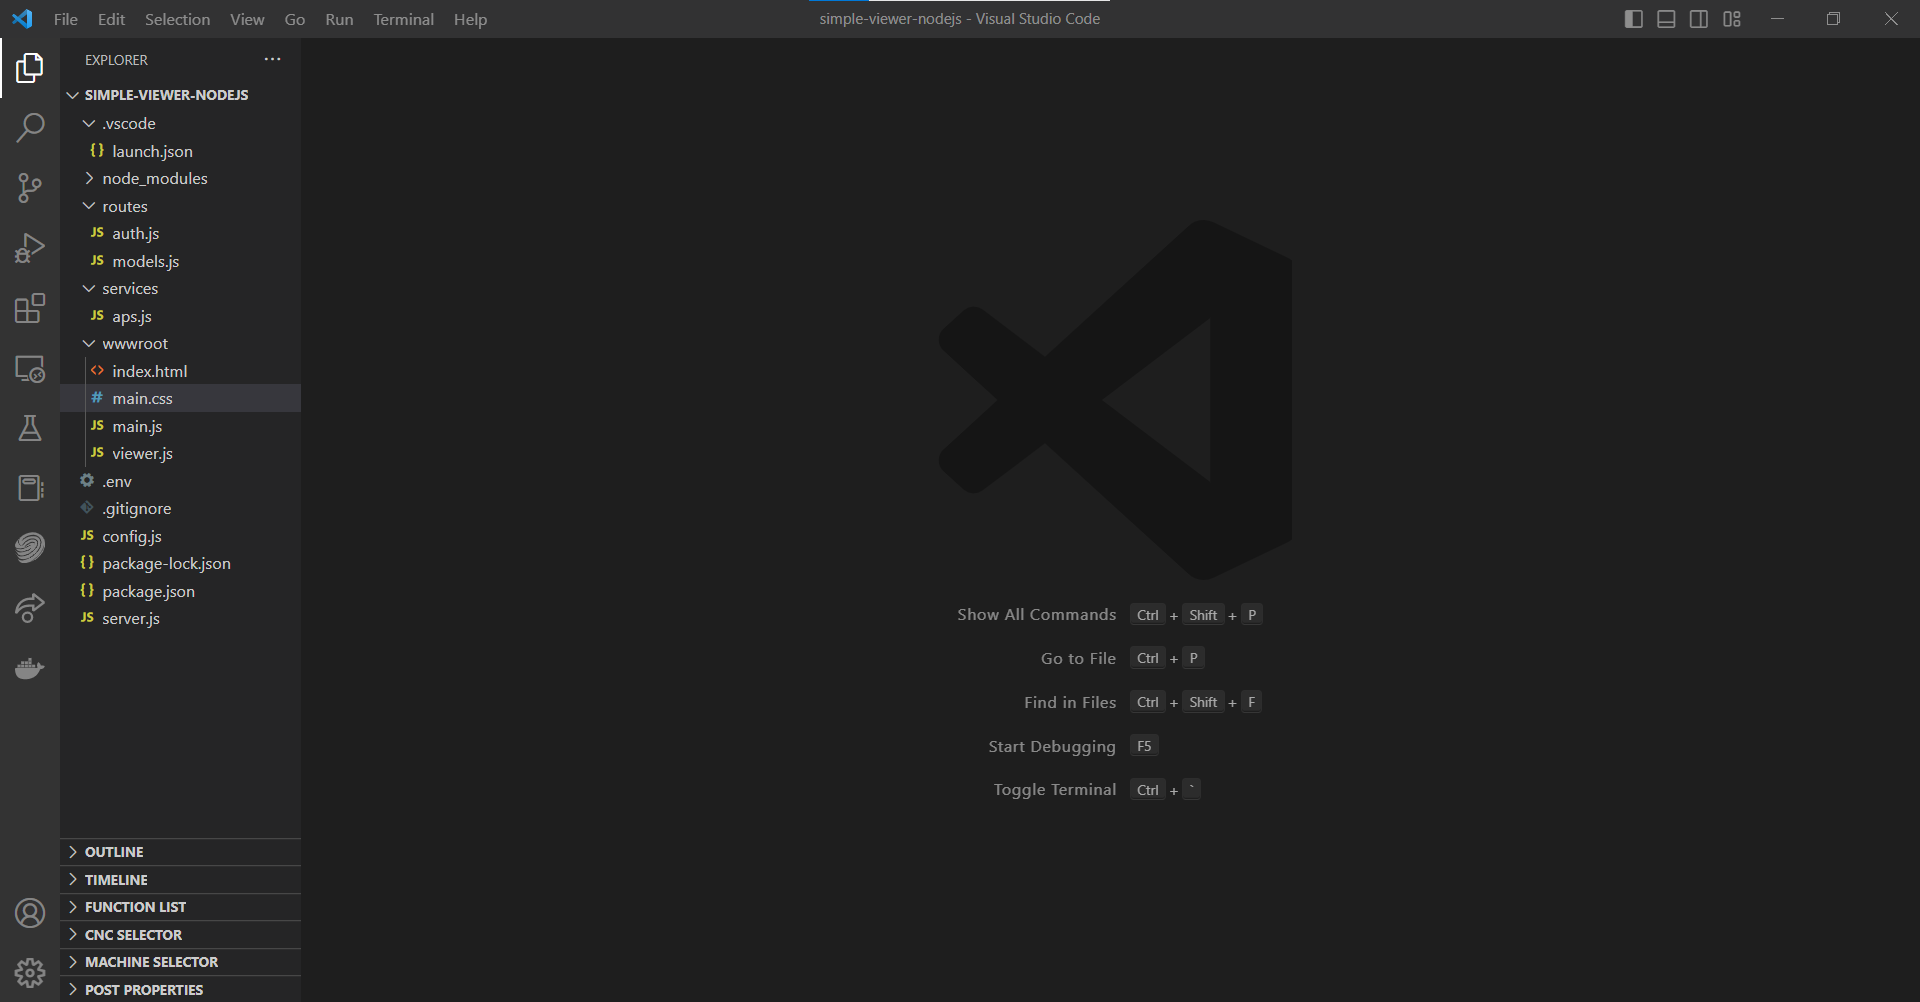
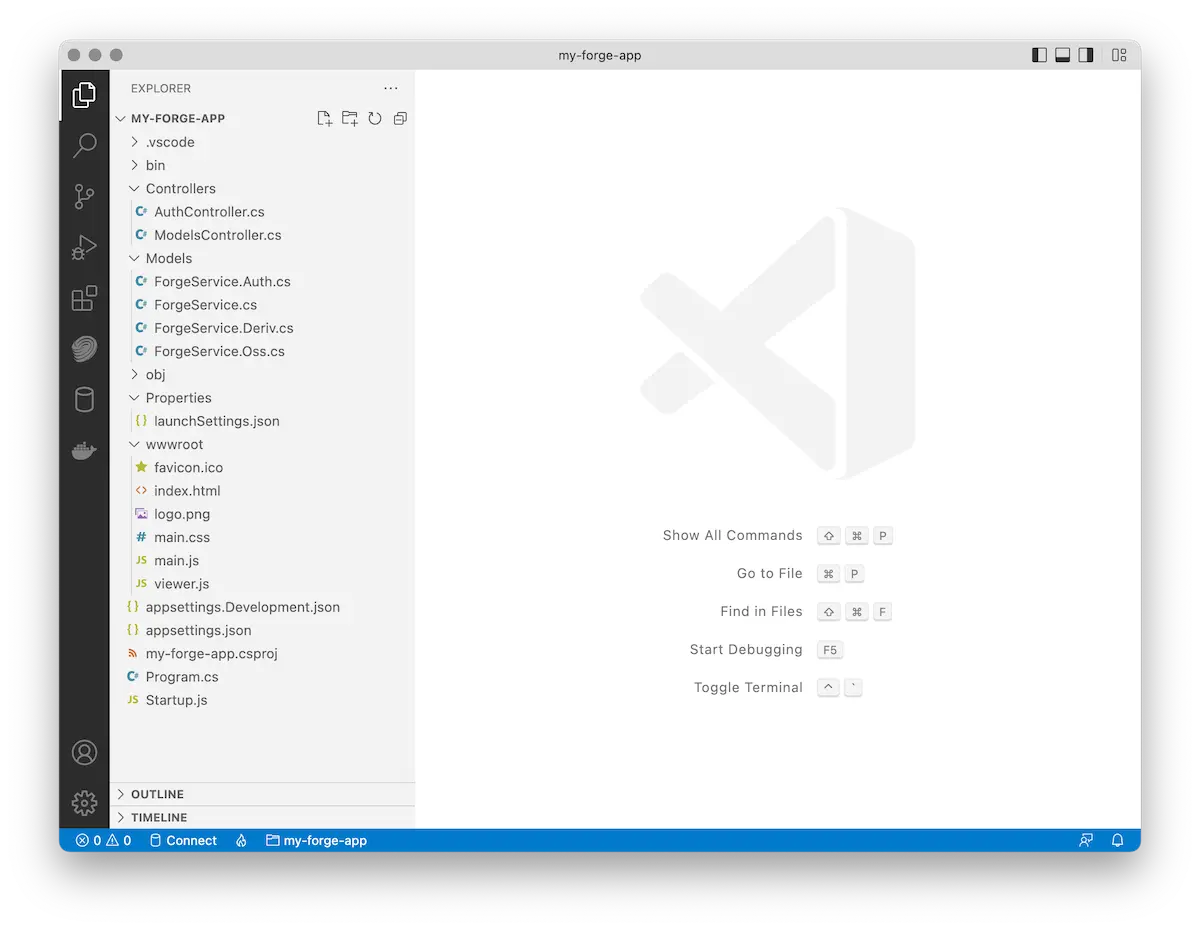
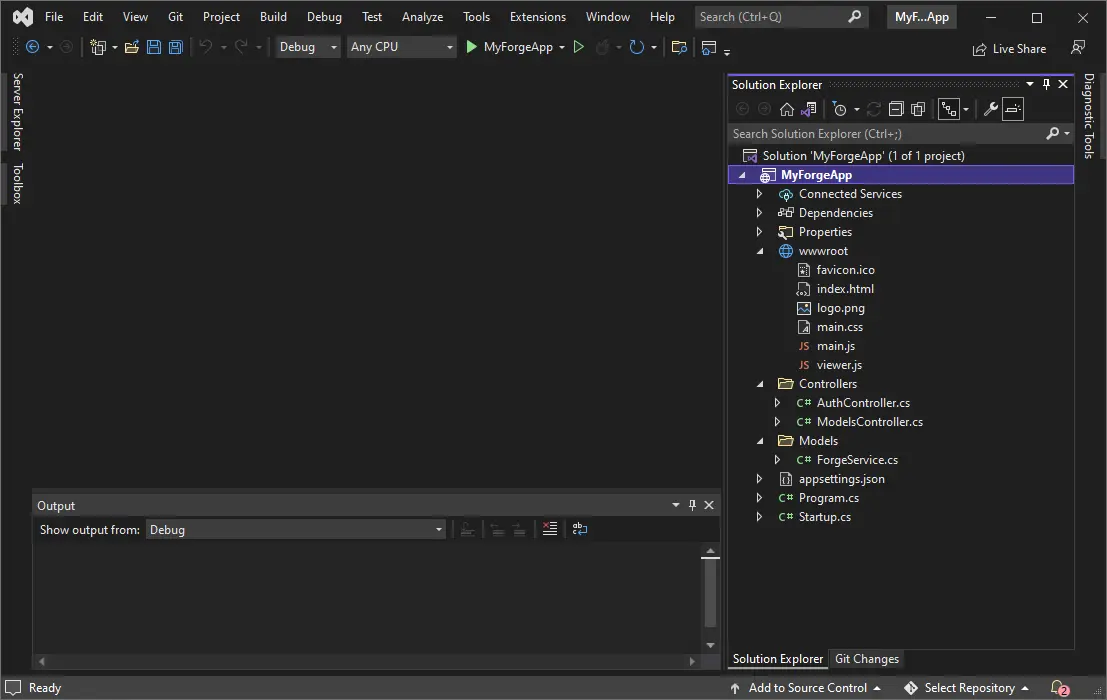
The final folder structure of your application's source code should now look something like this:
- Node.js & VSCode
- .NET 6 & VSCode
- .NET 6 & VS2022


Try it out
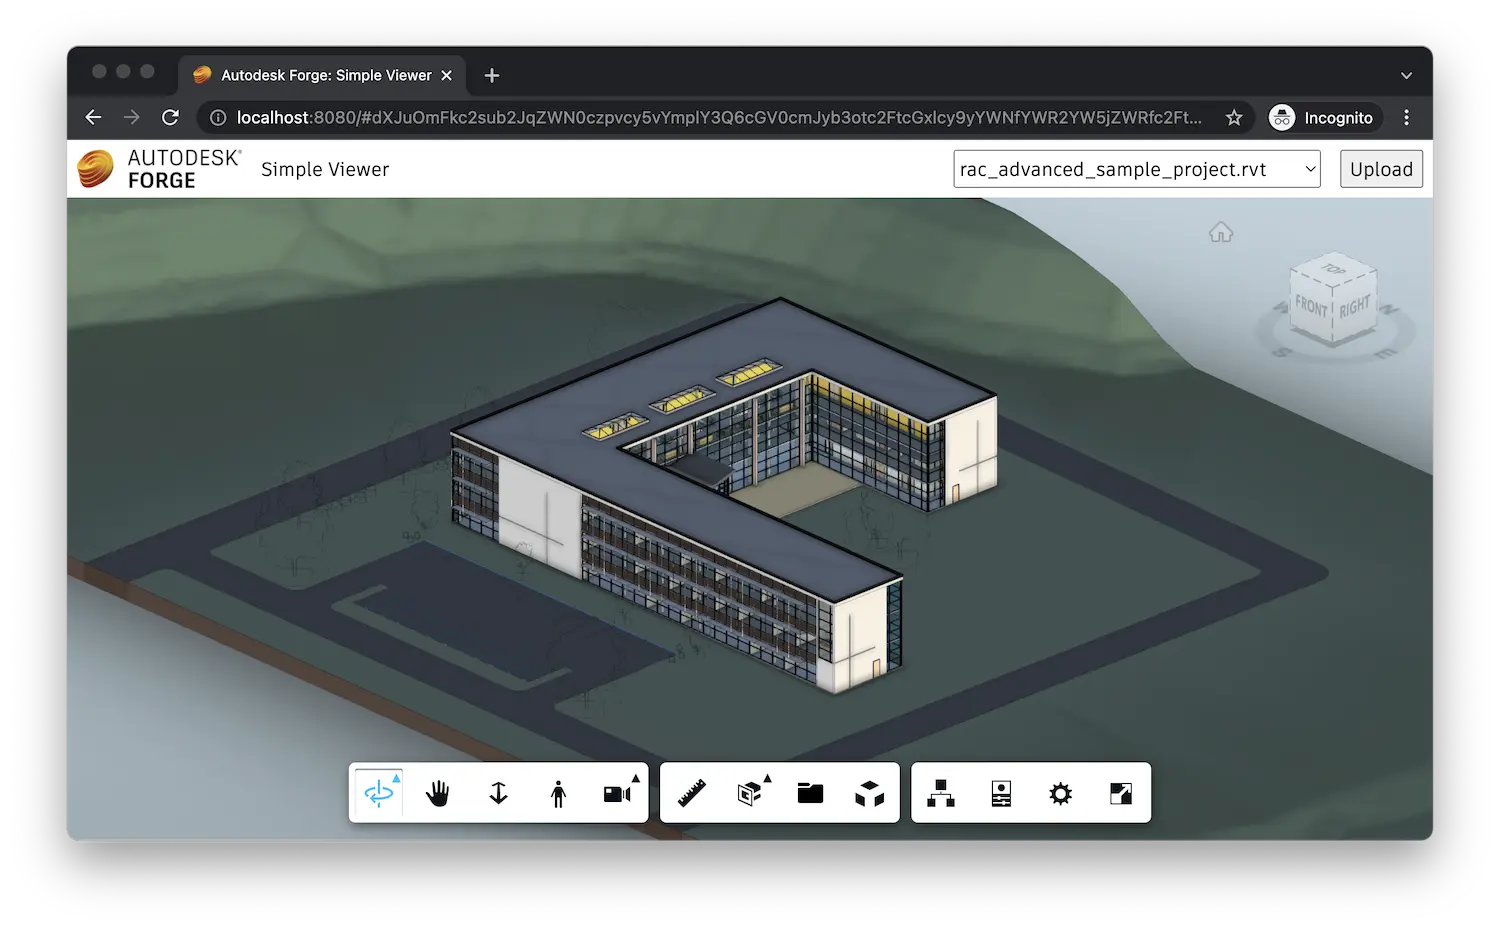
And that's it! Your application is now complete. Start (or restart) the app as usual, and navigate to http://localhost:8080 in your browser. You should be presented with a simple UI, with a dropdown in the top-right corner that will eventually get populated with all models available in your application's bucket, and with a button for uploading new models. As soon as you select one of the names from the dropdown, the corresponding model will get loaded in the viewer occupying the rest of the webpage.
If you don't have any testing design files readily available, you can try some of these publicly available ones:
